Automatic Table of Contents in Google Docs (2025 Guide)
In this tutorial, we will show you exactly how automatic table of contents in Google Docs is made. Simply follow the steps below.

How to Add an Automatic Table of Contents in Google Docs
Follow the steps below to insert an automatic table of contents on Google Docs.
1. Format Your Document Using Headings
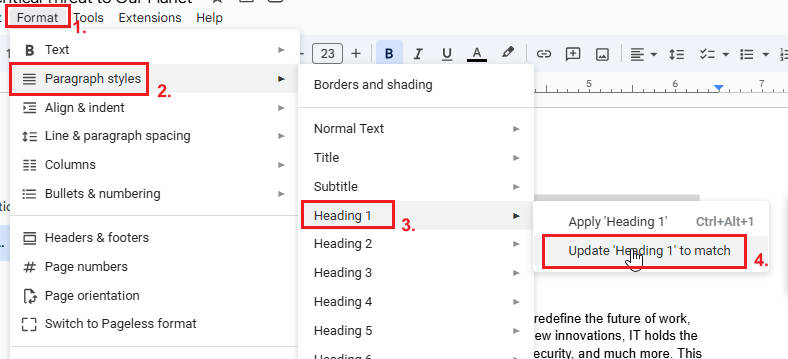
To generate an automatic table of contents, you need to structure your document with headings. Google Docs reads these heading styles to build your TOC. Start by highlighting the section title.

With the section title selected, go to the “Format” menu and click “Paragraph styles”. Hover over “Heading 1”, then select “Update ‘Heading 1’ to match”. This applies the Heading 1 style to the selected section title while keeping its current font size and format unchanged.
Format all major sections with the appropriate headings to ensure they automatically appear in your table of contents.
2. Insert the Automatic Table of Contents
Once your headings are set, position your cursor where you want the table of contents to appear. Go to the “Insert” menu, then scroll down to “Table of contents”. You can choose from three formats: ‘Plain Text’, ‘Dotted’, or ‘Links’.
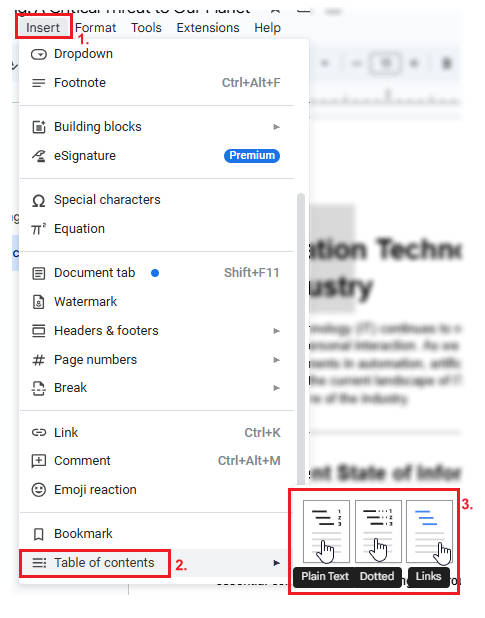
For this example, we will choose the “Dotted” format. Google Docs will automatically create and insert the table of contents with proper indentation based on the heading types. Additionally, leader lines will be included, along with the corresponding page numbers.

We hope that you now have a better understanding of how to automatically create a table of contents using Google Docs. If you enjoyed this article, you might also like our articles on how to remove a table without deleting the content in Google Docs and how to add a table of contents in the side of Google Docs.