Table Borders on Google Docs (The Ultimate Guide for 2025)
In this tutorial, we will show you exactly how to add table borders on Google Docs in just a few simple steps. Read on to learn more.

How to Add Borders to a Table in Google Docs
Follow the steps below to add a border to a table on Google Docs.
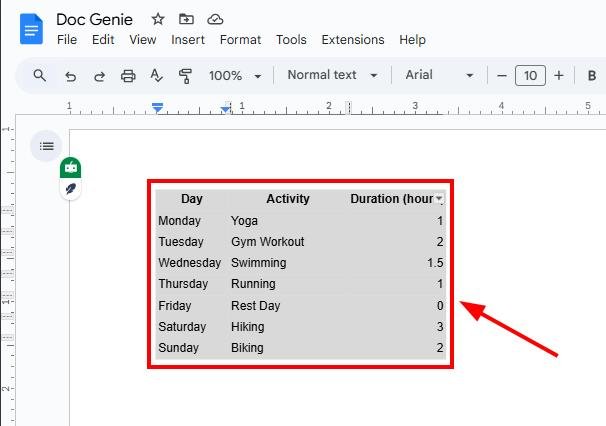
1. Highlight the Entire Table
Click and drag to select your entire table. Ensure all the cells are highlighted, so the border changes apply to the entire table.
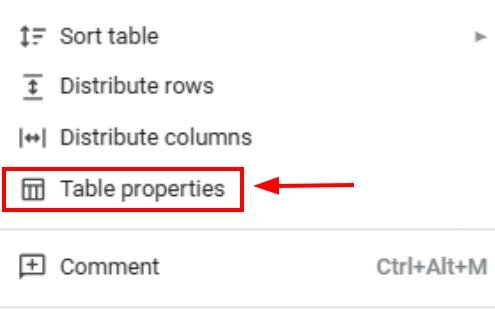
2. Right-Click and Select “Table Properties”
Right-click on the highlighted table to open a drop-down menu. From this menu, select “Table properties” to open the side panel for customizing your table settings.
3. Customize the Table Border in the Side Panel
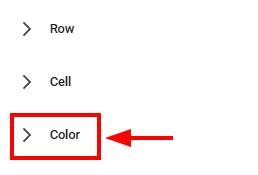
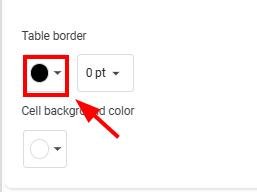
In the “Table properties” side panel, click on the “Color” tab to access both border thickness and color settings.
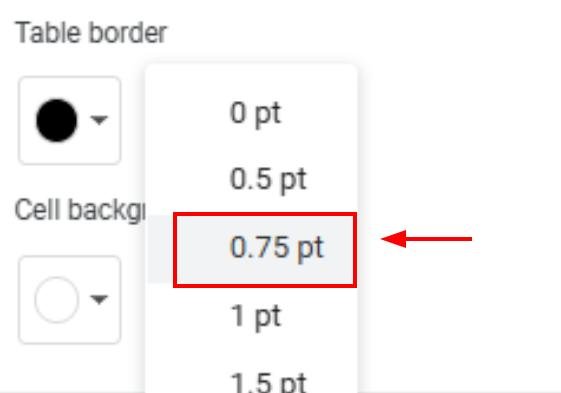
Locate the “Table border” section. Adjust the thickness by clicking this dropdown.
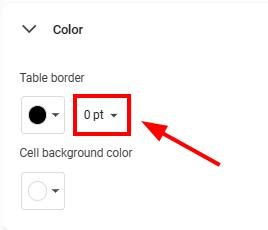
Let’s select “0.75 pt.”
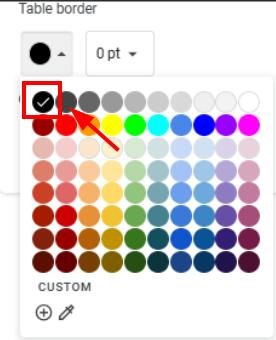
You can also pick a color to customize the look of your table. Click on this dropdown.
For example, let’s select the black border color.
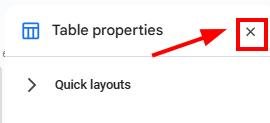
4. Close the Side Panel and Review Your Table
Click the “x” on the “Table properties” side panel to close it. Check your table to see if the border looks the way you want. If necessary, repeat the steps to make further adjustments.
We hope that you now have a better understanding of adding table borders in Google Docs. If you enjoyed this article, you might want to check our articles on how to change table border colors in Google Docs and how to edit table borders in Google Docs.